
Manage users
≈ 3 min read
In User Management you see all users of your organization with their role, organization, language setting and the status of two-factor authentication. From here you invite new colleagues and modify existing accounts.
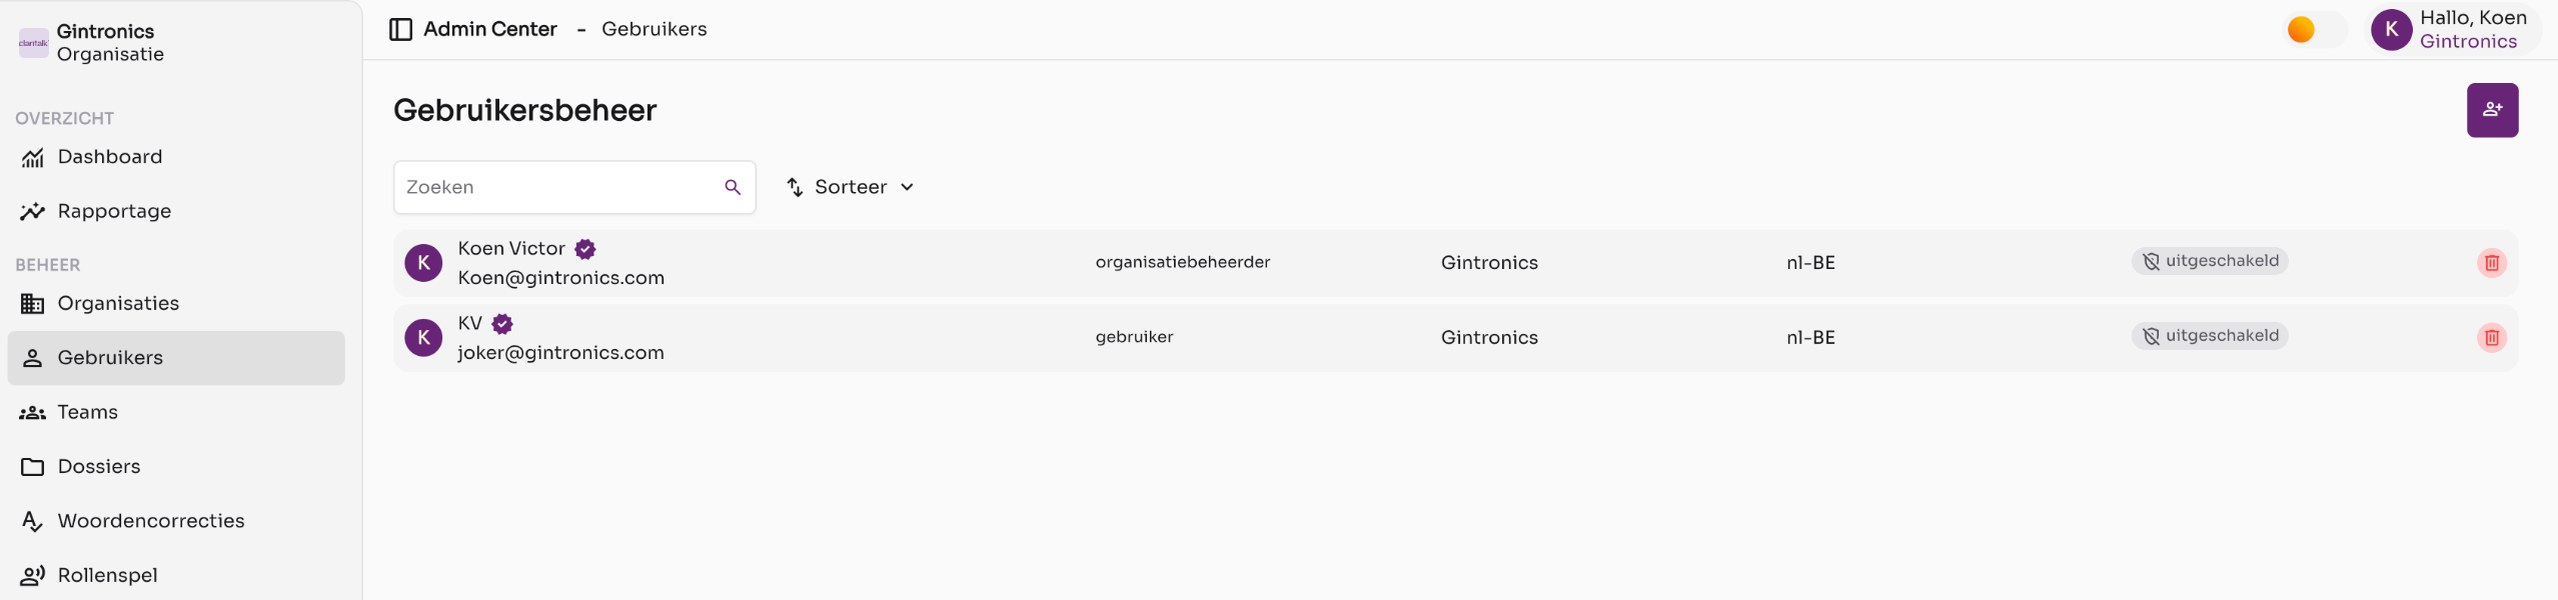
Invite a new user
- Open Users
Click Users in the left menu.
- Click the invitation icon
In the top right is a purple button with a person and a plus sign. The window Invite a new user opens.
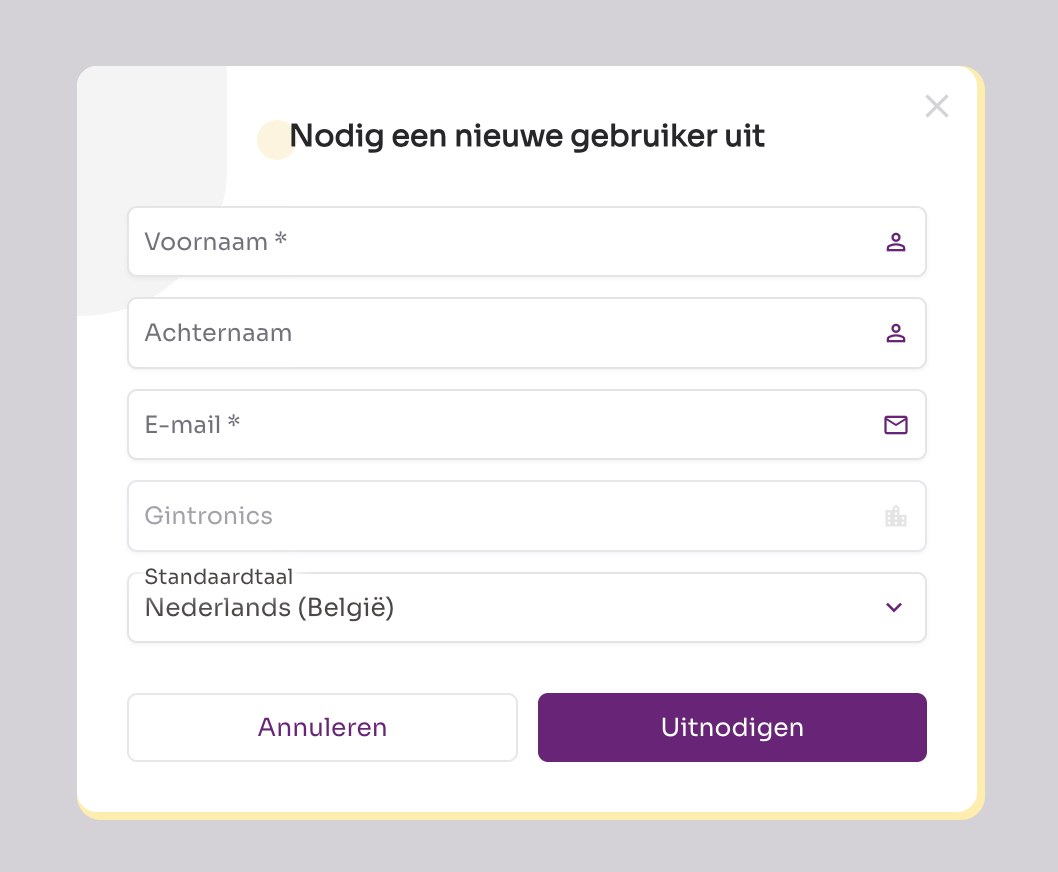
The invitation window. - Enter the information
Provide at least the first name and email address. The organization is pre-filled. Choose the language in Default Language in which the user will see Claritalk.
- Click Invite
Your colleague receives an email with a link to set a password. After the first login, the user appears in the overview with the role user.
Change a user's role
- Open the user
Click the user's name in the overview. You go to the detail page with three sections: Personal Information, Permissions and Settings.
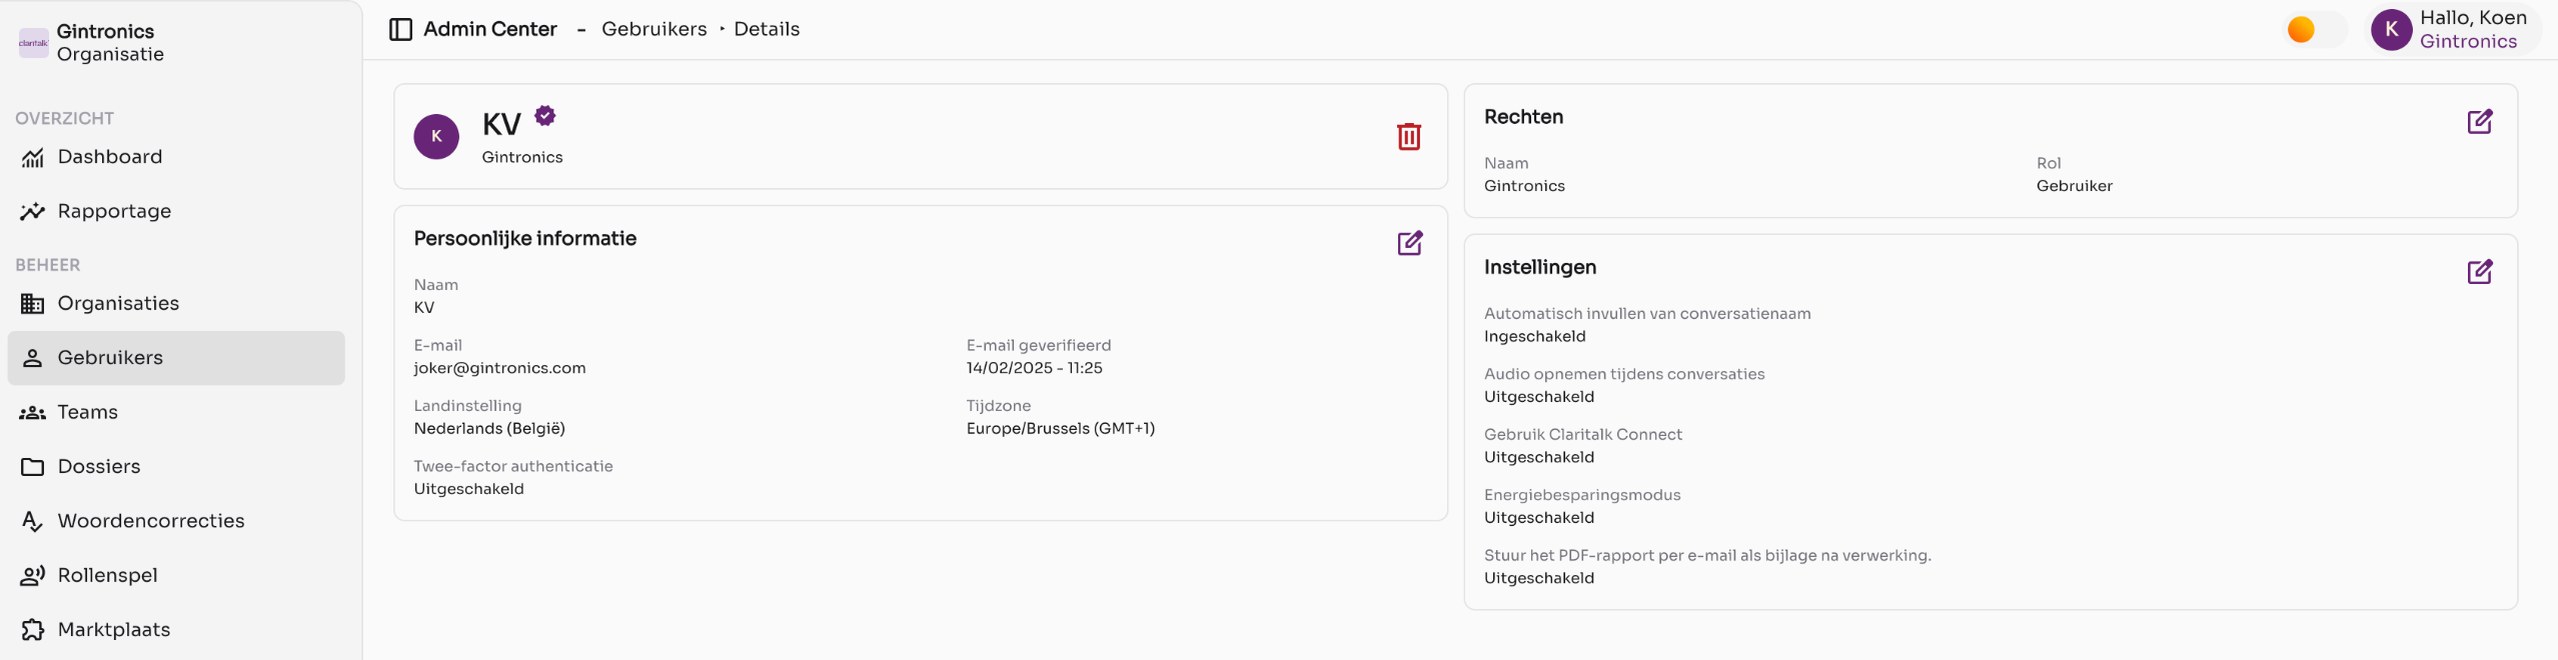
The detail page of a user. - Click the pencil icon in Permissions
A dropdown list Role appears. Select the desired role and click Change.
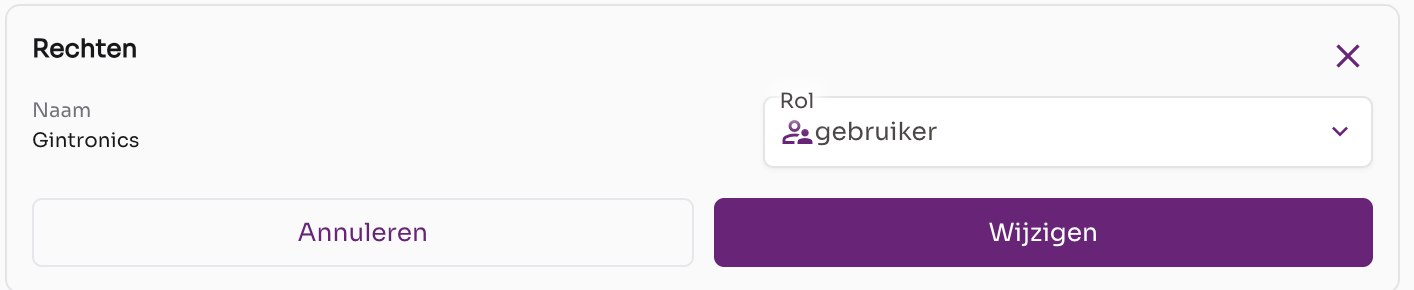
Adjust the role in the Permissions section.
| Role | What the user can do |
|---|---|
| user | Record conversations, view reports and work in the files to which he or she has access. |
| organization administrator | Everything a user can do, plus access to the Admin Center. |
| admin.billing | Billing administrator: manages the organization's licenses and billing. |
Adjust a user's personal settings
In the Settings section you manage the preferences that the user normally sets themselves. Click the pencil icon, toggle the switches and click Change.
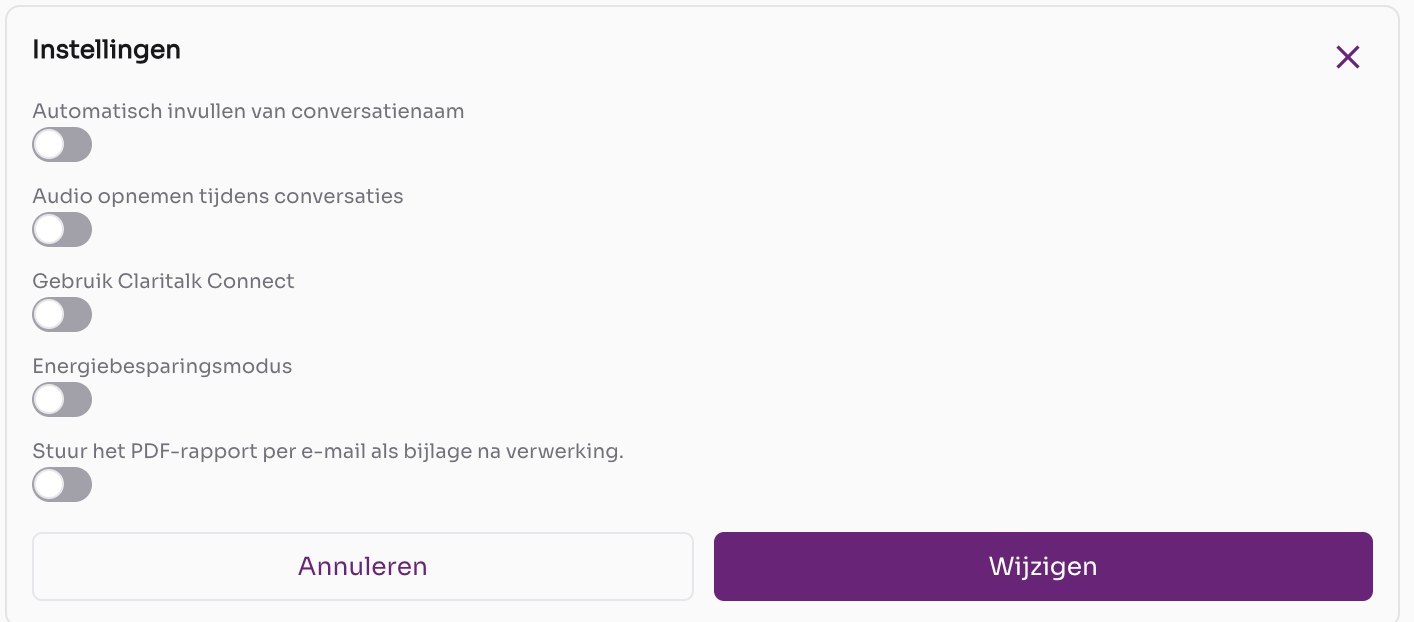
| Setting | What it does |
|---|---|
| Auto-fill conversation name | Claritalk automatically suggests a title for each conversation. |
| Record audio during conversations | The audio of conversations is saved (if the organization allows it). |
| Use Claritalk Connect | The user works with the Claritalk Connect desktop app for conversation detection. |
| Power saving mode | Reduces Claritalk Connect consumption on laptops. |
| Send the PDF report by email as an attachment after processing | After each processed conversation, the user receives the PDF report in the mailbox. |
Edit personal information
Via the pencil icon at Personal Information you adjust the name, email address, locale and time zone. You can also see when the email address was verified and whether two-factor authentication is active.
Remove a user
- Click the red trash icon
It is located on the right in the user's row in the overview, or in the top right on the detail page.
- Confirm
The user immediately loses access to Claritalk.
Good to know
Do not remove a user to temporarily block access. The user's conversations remain saved in the files, but you cannot restore the account itself.
- The green check mark next to a name means the email address is verified.
- The disabled badge on the right in the row shows the status of two-factor authentication. If you want to enforce this for everyone, enable the setting Require two-factor authentication for all members on the organization page.
- Rolling out users via Microsoft Intune? See the article How do I distribute Claritalk Connect to different users with Microsoft Intune?.